
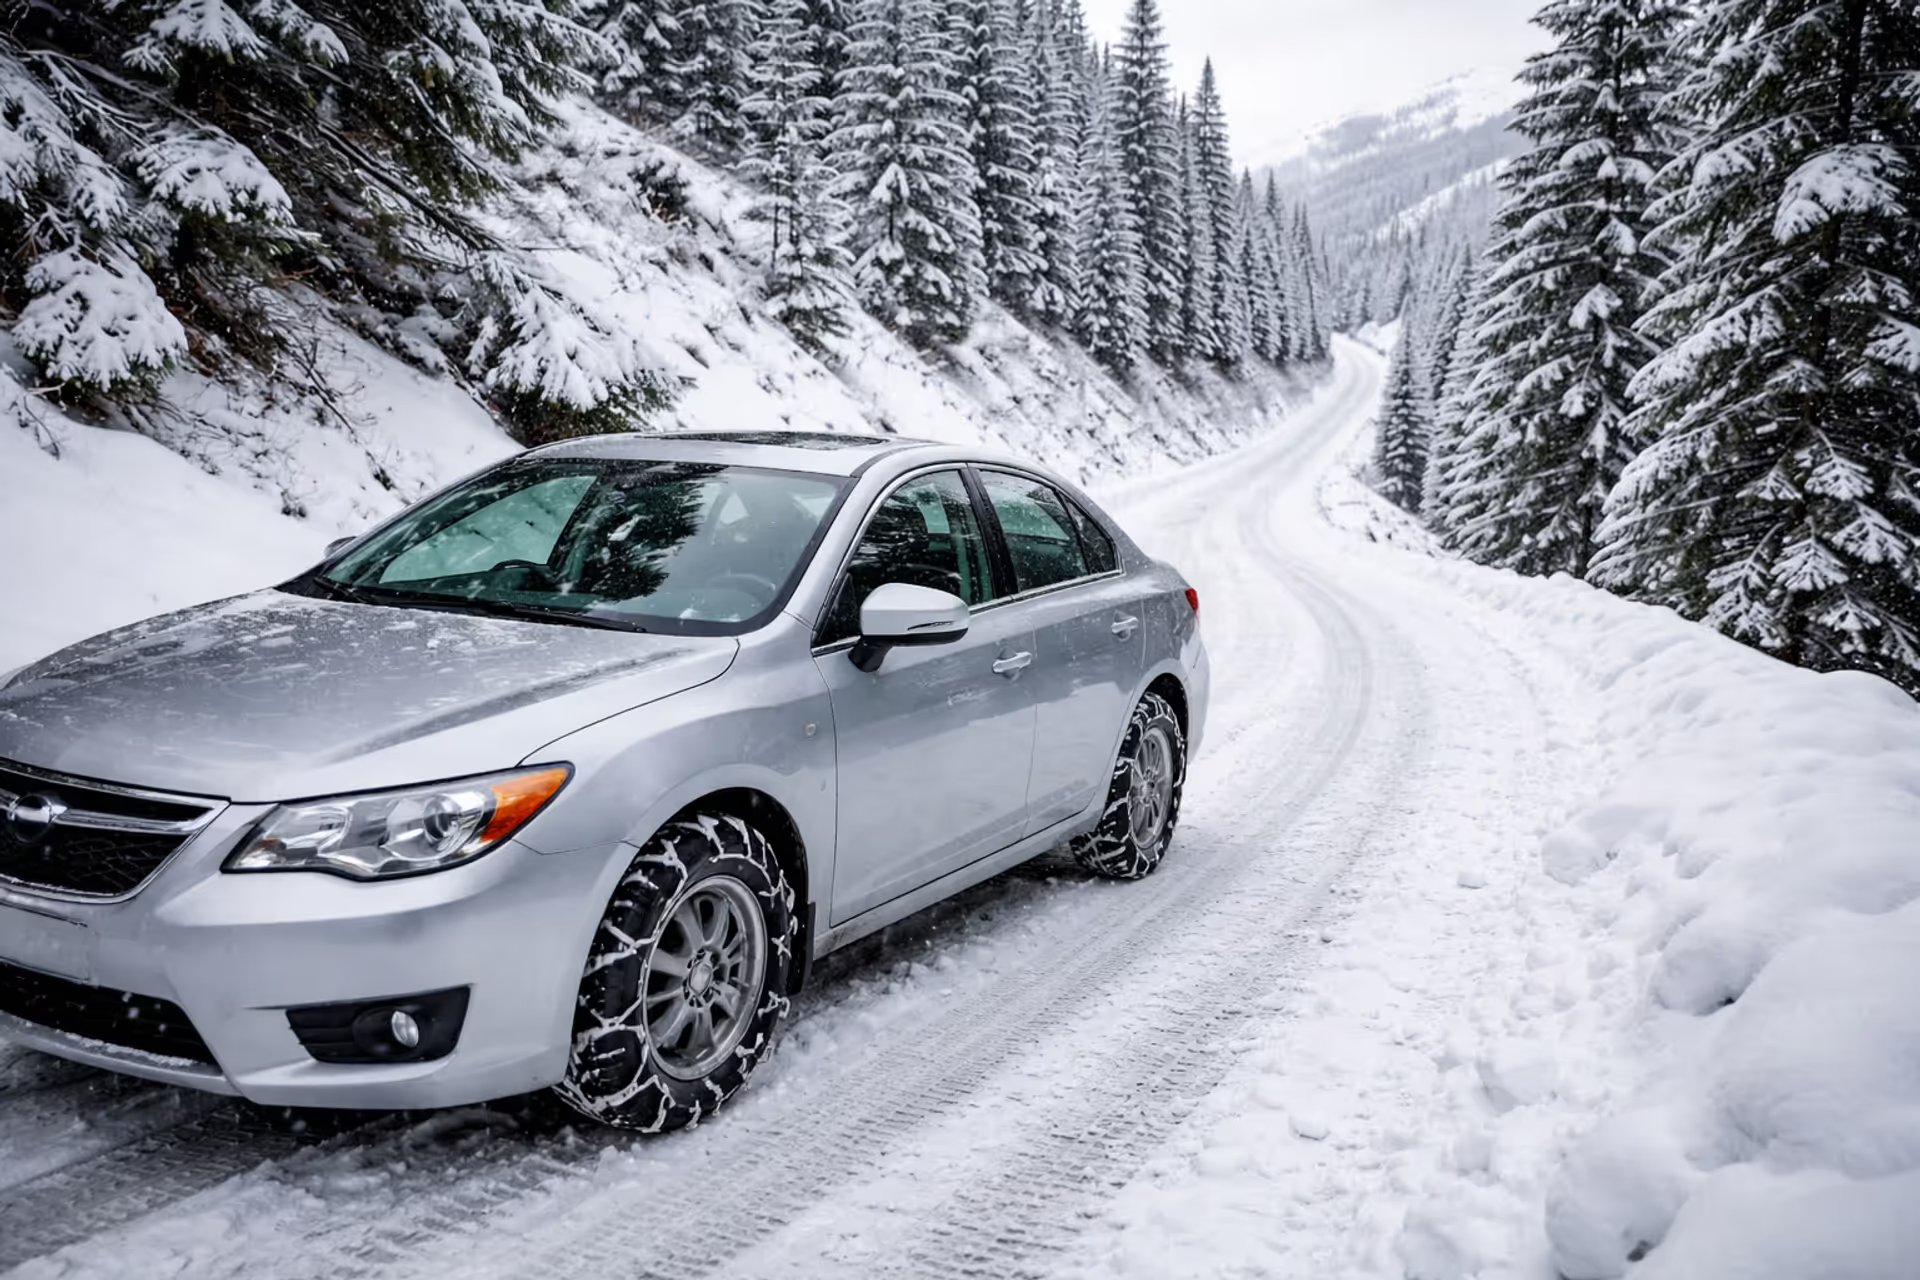
Snow chains installed on front tires of a sedan parked on a snowy mountain road with pine trees and overcast winter sky
Snow Chains Guide: How to Choose, Install, and Drive Safely This Winter

Last February, I watched a Tesla Model 3 with bald all-seasons slide backward down Donner Pass while traffic sat frozen for three hours. The driver didn't have chains. Highway Patrol eventually towed him back down the mountain, along with seventeen other unprepared vehicles that same afternoon.
That's $500 in towing fees, plus a $300 citation, plus missing a day of skiing—all preventable with $60 worth of cable chains and fifteen minutes of preparation.
What Are Snow Chains and When Do You Actually Need Them?
Picture wrapping a metal ladder around your tire. That's essentially what chains do—they convert your smooth rubber tire into an aggressive snow-gripping surface by adding steel links or cables that dig into packed snow and ice.
The basic design hasn't changed much since the 1920s. Traditional chains connect hardened steel links into ladder or diamond patterns. Each link bites into snow as the tire rotates. Cable versions swap those heavy links for twisted steel aircraft cable fitted with metal gripping cams—same concept, lighter execution.
Shopping for chains gets confusing because terminology varies. Walk into an auto parts store and ask for "chains," and you'll get questions: Do you mean traditional link chains? Cable chains? Traction devices? Here's what those terms actually mean. Traditional chains use 3-5mm thick metal links arranged in patterns across your tire. Cables substitute twisted steel wire (2-3mm) for those heavy links. "Traction devices" covers everything—chains, cables, textile socks, and other temporary grip solutions that meet legal requirements.
When do you actually need them? Your winter tires work great until they don't. Once snow packs down into ice, or accumulates faster than plows can clear it, even the most aggressive winter tire compounds lose their grip. That's when chains become necessary rather than optional.
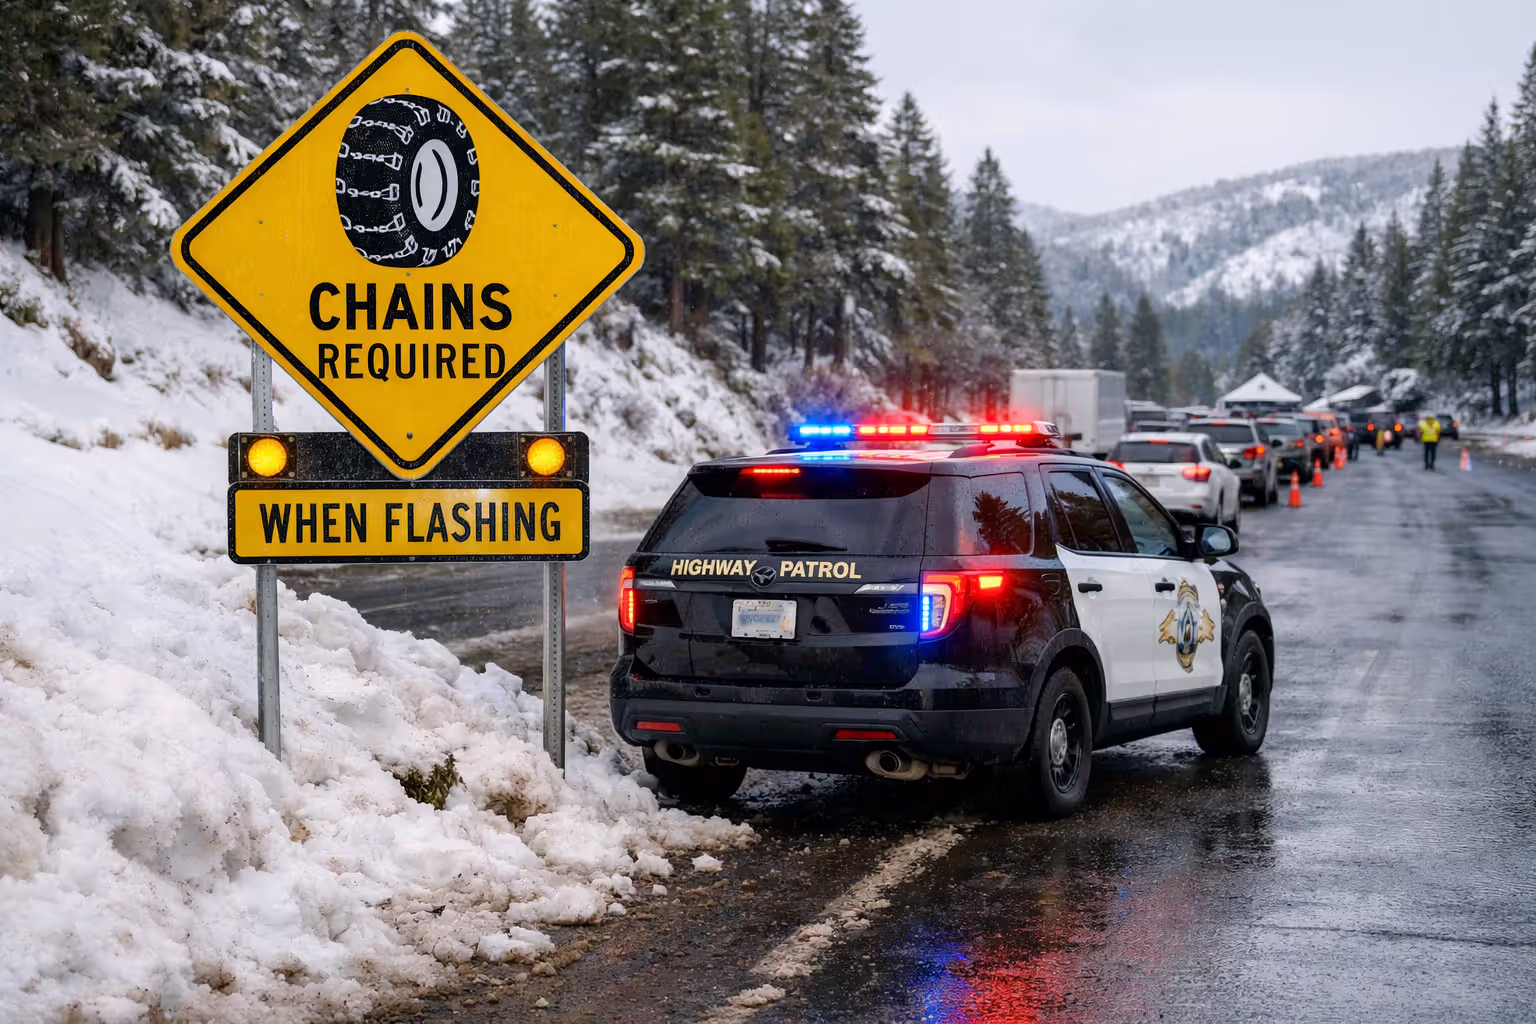
I've driven I-80 through the Sierras for fifteen years. The pattern repeats every winter: a storm dumps two feet overnight, temperatures drop, traffic packs that fresh powder into a skating rink, and by 8 AM Highway Patrol closes the road until everyone installs chains. Your Subaru with winter tires? Doesn't matter. Your F-150 with 4WD? Still needs chains. Those "Chains Required" signs aren't suggestions—they're legal mandates backed by fines and potential liability if you cause an accident without proper equipment.
California's I-80, Colorado's I-70 through the Eisenhower Tunnel, Washington's Snoqualmie Pass, and Oregon's mountain highways all enforce chain requirements regularly between November and April. Miss the signs at your own financial and legal risk.
Before anything else, preparation is the key to success
— Alexander Graham Bell
State-by-State Legal Requirements for Snow Chains
Every western state handles chain requirements differently, creating a confusing patchwork of rules that changes as you cross state lines.
Before planning any winter mountain trip, here's the enforcement reality across snow-belt states:
| State | Requirement Levels | Major Highways Affected | Who Gets Exemptions | Violation Costs |
| California | Three tiers: R1, R2, R3 | Interstate 80, Highway 50, I-5 northern section | AWD plus winter tires during R1 only | $300 minimum, up to $5,000 |
| Colorado | Traction Law and Chain Law | Interstate 70, Highway 40, Highway 550 | AWD with proper tread during Traction Law | $130 base, reaches $650 |
| Oregon | Chains Required | Highway 26, Interstate 84, Highway 97 | Studded tires satisfy requirement | $435 flat fine |
| Washington | Chains Required | Interstate 90, Highway 2, State Route 20 | Approved alternatives work | Starts at $500 |
| Nevada | Chains or Winter Tires | Highway 50, Interstate 80, Mount Rose Highway | AWD sometimes exempt depending on conditions | $500 to $1,000 range |
| Idaho | Chains Required | Interstate 90, Highway 95 | Commercial trucks prioritized for enforcement | $300 typical |
California operates the most complex system worth understanding in detail. Their R1 designation means chains go on drive wheels OR you're running 4WD/AWD with winter-rated tires. Step up to R2 (the common level during active storms), and 2WD vehicles must chain drive wheels while 4WD/AWD vehicles need chains on at minimum one drive axle. R3 is the nuclear option—literally everyone chains up, no exemptions, no excuses.
Beyond the immediate fine, enforcement carries hidden costs. Cause a traffic backup or accident because you lacked chains? California and Colorado bill you for emergency response, which routinely exceeds $10,000 on major interstates. Some states will impound your vehicle on the spot if you block traffic due to insufficient traction equipment.
Those "Chains Required" signs appear at consistent checkpoint locations every winter. Highway Patrol knows exactly where vehicles struggle most—steep grades, exposed sections, sharp curves. Officers staff these checkpoints during active storms, physically walking the line of stopped vehicles to verify compliance. They'll turn around anyone lacking proper equipment. No debate, no second chances. Either show them chains (or qualifying alternatives) or head back down the mountain.
Author: Kevin Thornton;
Source: shafer-motorsports.com
Types of Winter Traction Accessories: Chains, Cables, and Alternatives
Walk into a ski shop in Tahoe and you'll face a wall of traction devices ranging from $40 cable sets to $300 commercial-grade V-bar chains. Understanding what differentiates them saves money and frustration.
Traditional Link Chains vs. Cable Chains
Heavy-duty link chains built from 4-5mm steel dominate commercial and severe-use applications. Manufacturers arrange these links in three common patterns. Ladder patterns run straight across the tire perpendicular to rotation—cheap to manufacture, rough riding, prone to wear. Diamond patterns crisscross the tire surface, distributing forces more evenly for smoother operation and better side-to-side grip. V-bar chains add protruding hardened steel bars that extend 10-15mm beyond the chain surface for maximum penetration in deep snow.
My father-in-law runs logging roads in Northern Idaho all winter. He won't touch anything except V-bar chains—the extra bite matters when you're crawling up 12% grades with two feet of fresh powder over ice. For his use case, the harsh ride and noise don't matter compared to the traction gains.
Cable chains replace those heavy links with braided steel aircraft cable measuring 2-3mm diameter. Manufacturers add metal traction rings or hardened cams along the cable for grip. The weight advantage is dramatic—cable chains weigh 40-50% less than equivalent link chains. They also fit vehicles with minimal wheel well clearance where traditional chains physically won't clear brake calipers or suspension components.
Trade-offs exist. Cables wear out faster, particularly on bare pavement. Expect 200-300 miles of service from quality cable chains versus 500+ miles from heavy link chains. If you're commuting daily through chain-control zones, links justify their cost. Weekend ski warriors heading up maintained highways twice per month? Cables work fine and install significantly faster.
The right tool for the right job makes all the difference between success and failure
— Henry Ford
Tire Socks and AutoSock Technology
Imagine a thick fabric cover that slides over your tire like pulling a sock over your foot. That's exactly what tire socks are—high-strength textile (usually polyester or similar synthetic) engineered with special weaving for snow friction.
AutoSock pioneered this category and still dominates market share. Installation takes under two minutes per tire once you understand the technique. The fabric grips packed snow through friction rather than mechanical biting like metal chains. Most western states accept them as legal traction devices during chain requirements.
Performance limitations matter. Tire socks excel on packed snow at moderate speeds (under 30 mph). They provide minimal help on ice where mechanical biting matters more than friction. They absolutely shred themselves on bare pavement—even a quarter mile of clear asphalt damages them significantly.
I keep AutoSocks in my wife's sedan as emergency backup. She drives Tahoe twice per winter, and twice per winter she inevitably hits unexpected chain requirements. The AutoSocks get her through the chain-control checkpoint legally and provide enough traction to crawl ten miles to where roads clear. They're not all-day solutions, but they beat sitting at the bottom of the pass waiting for conditions to improve.
Cost-wise, expect $80-$150 per pair. They're single-season items if you use them regularly, multi-season if only deployed for emergencies.
Studded Tires vs. Temporary Traction Devices
Studded tires sit in a different category—permanent winter installations rather than temporary devices you add and remove. Manufacturers embed 80-100 tungsten carbide studs per tire that protrude 1-2mm beyond the tread surface. Those studs bite into ice like cleats, providing dramatically better ice traction than any rubber compound.
Most states restrict studded tire usage to November-March (dates vary by state) and some prohibit them entirely due to the road surface damage they cause. Oregon, Washington, and Alaska embrace them. California and Wisconsin ban them outright. Colorado allows them with date restrictions.
Here's the critical distinction: studded tires help with ice, not deep snow. They satisfy legal traction requirements during R1-level chain laws in most jurisdictions but don't replace chains when authorities declare R2 or R3 conditions. If you're facing six inches of fresh powder over ice, studded tires alone won't cut it—you're still chaining up.
| Device Type | Minutes to Install | Cost Per Pair/Set | Service Life | Ideal Conditions | Maximum Speed |
| Link Chains | 10-20 minutes | $50-$200 | 500+ miles | Deep snow, ice, steep terrain | 30 mph |
| Cable Chains | 5-15 minutes | $40-$120 | 200-300 miles | Packed snow, limited clearance vehicles | 30 mph |
| Tire Socks | 2-5 minutes | $80-$150 | 50-100 miles | Emergency use, packed snow | 30 mph |
| V-Bar Chains | 15-25 minutes | $100-$300 | 700+ miles | Commercial use, severe conditions | 25 mph |
| Studded Tires | Professional installation required | $600-$1,200 complete set | One winter season | Ice, daily winter commuting | Normal speed limits apply |
How to Choose the Right Snow Chains for Your Vehicle
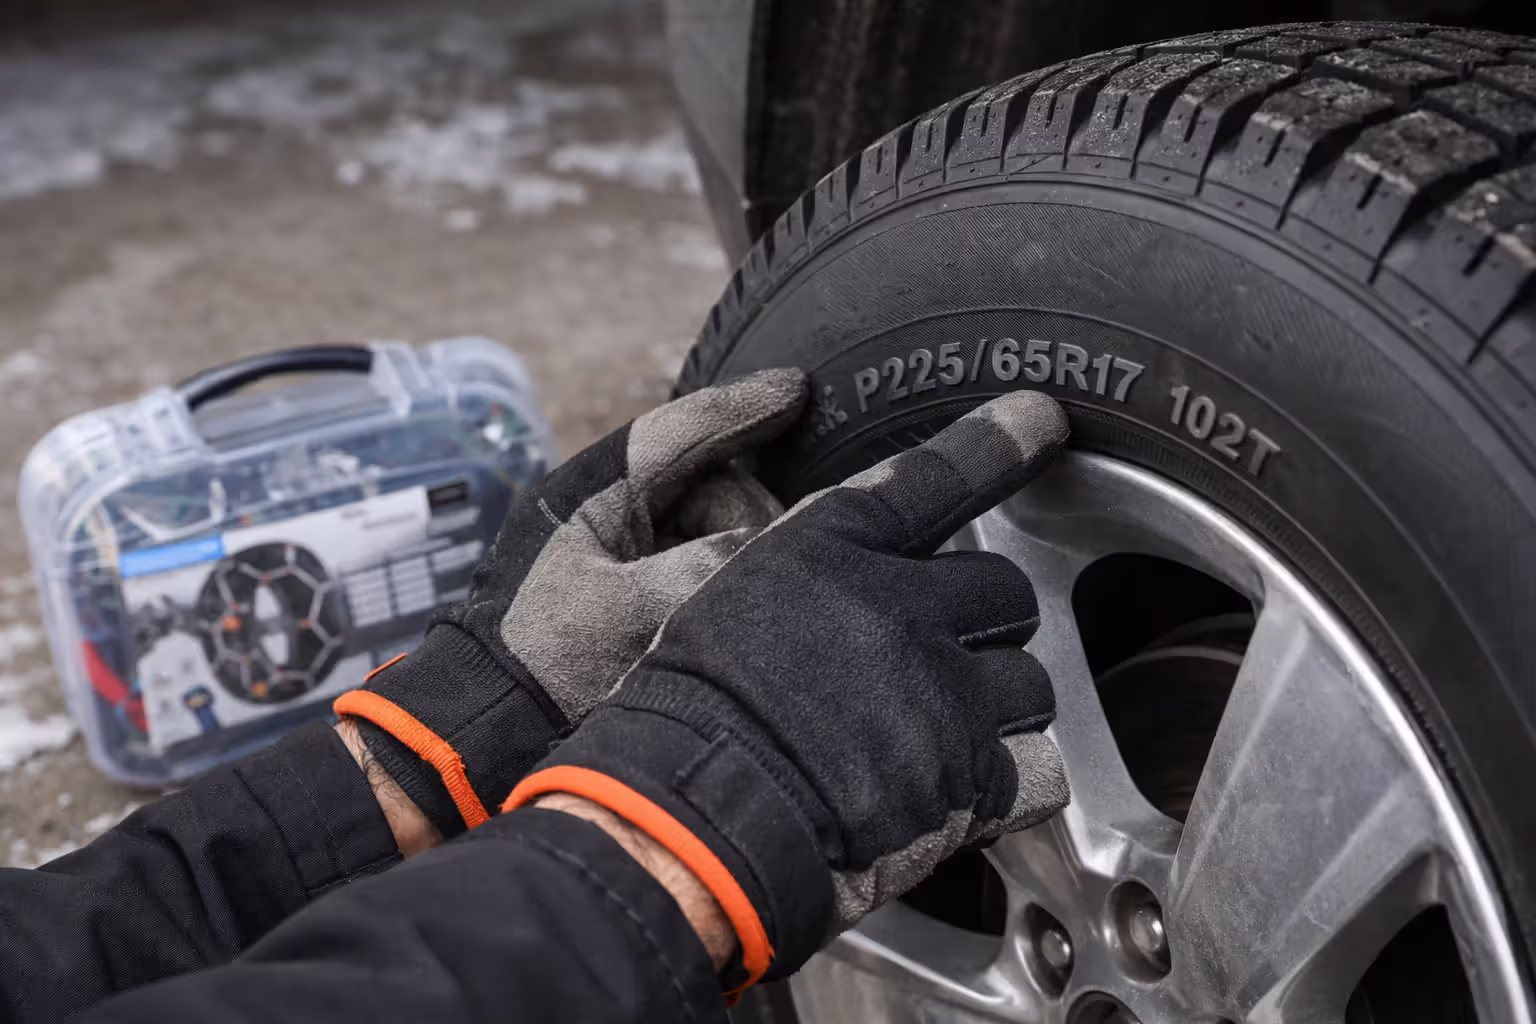
Chain shopping starts with three measurements: your exact tire size, available wheel well clearance, and which wheels receive power.
Flip open your driver's door—there's a sticker listing tire specifications. Or walk outside and read your tire sidewall. You'll see something like P225/65R17. That's not a suggestion—it's the exact size chains must match. Even small variations cause problems. Chains sized for P225/60R17 won't fit P225/65R17 properly despite sharing the same width (225) and wheel diameter (17). That middle number (aspect ratio) affects overall tire diameter enough to make chains too loose or too tight.
Every chain package lists compatible tire sizes. Verify yours appears on that list before buying. I've watched countless drivers discover their chains don't fit in gas station parking lots at midnight during snowstorms because they grabbed the wrong size.
Clearance issues kill more chain purchases than any other single factor. Modern vehicles—particularly sports sedans, performance wagons, and anything with upgraded brake packages—often lack the 1-2 inches of space between tire and wheel well that traditional chains require. Your owner's manual specifically addresses chain compatibility. Page through it or download the PDF from the manufacturer's website. Many explicitly state "chains not recommended due to insufficient clearance."
Found that discouraging message in your manual? You're not stuck walking. SAE Class S chains (S stands for Special, meaning special limited-clearance applications) use thinner profiles specifically for tight-clearance vehicles. They sacrifice some durability for that lower profile but still meet legal requirements. Low-profile cable chains and tire socks also fit where traditional chains can't.
Which axle needs chains depends on which wheels drive your vehicle. Front-wheel-drive? Chain the front. Rear-wheel-drive? Chain the rear wheels instead. All-wheel-drive and four-wheel-drive systems complicate this—your owner's manual specifies which axle(s) to chain, but generally you'll chain at minimum the rear axle. Some AWD systems require chains on all four corners, particularly performance-oriented systems that heavily bias rear power delivery.
Never, ever chain just one tire. Chaining the driver's side but not passenger's side creates catastrophic handling imbalances. Chains must go on both tires of any axle you're chaining. Buy them in pairs for this reason.
Rental vehicles present special challenges since most rental contracts explicitly prohibit chains due to damage liability concerns. Planning a winter rental? Call ahead and request 4WD or AWD equipped with winter tires, which satisfies R1 requirements across most states. Mountain resort town rental agencies (Tahoe, Vail, Park City) sometimes offer chains as rental add-ons, though availability runs thin during peak winter weekends.
Author: Kevin Thornton;
Source: shafer-motorsports.com
Step-by-Step Installation Guide for Snow Chains
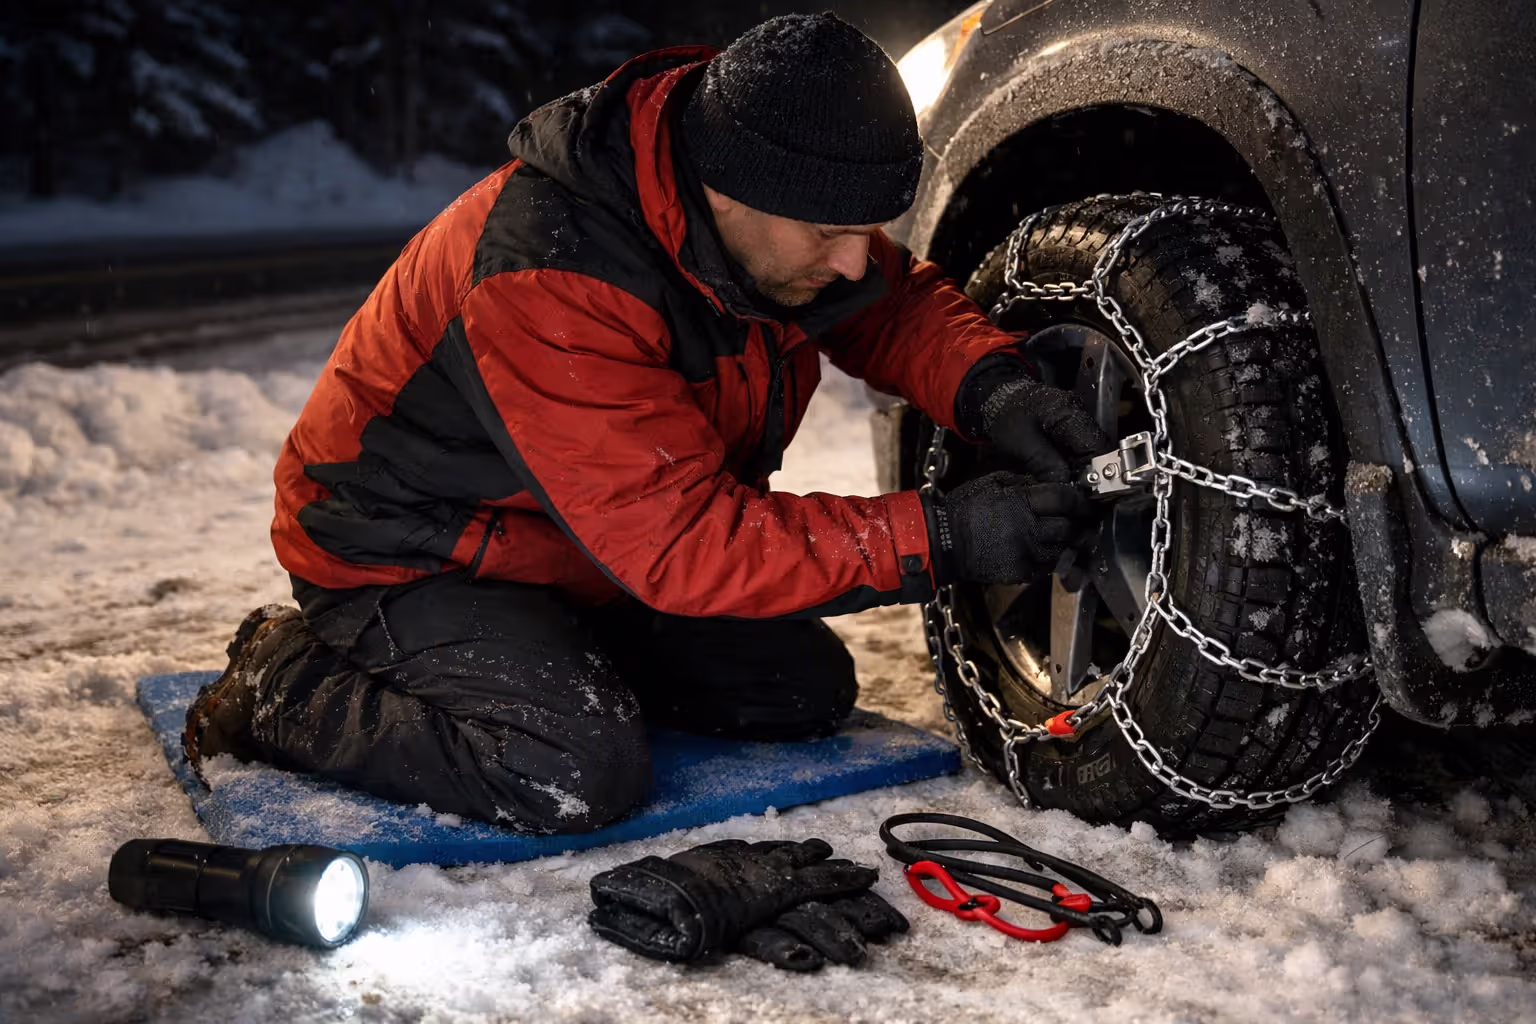
Installing chains for the first time in a snowy parking lot at night while traffic streams past ranks among life's genuinely miserable experiences. Smart drivers practice at home first.
Spread your chains flat on your garage floor. Untangle them completely—they ship tangled, and fighting that tangle in the dark while snow melts down your collar is no fun. Identify inside versus outside orientation. Most chains mark this with color-coded connectors or directional arrows. Practice draping them over a tire and connecting all fasteners until the process feels smooth. Fifteen minutes of practice at home prevents forty-five minutes of frustration later.
When actual conditions require chains, pull completely off the roadway. Don't stop on shoulders or in traffic lanes. Major mountain passes provide designated chain-up areas specifically for installation—wide pullouts with good lighting and space to work safely. Use them.
Here's the installation sequence that works:
Drape chains flat on the pavement directly behind the tire you're chaining. Center them carefully. Drive forward slowly (one complete tire rotation) so the tire rolls onto the chains. Now the chains are partially wrapped around the bottom third of your tire.
Pull the remaining chain up over the tire top. Connect the inside fastening system first—typically a hook-and-chain setup or cable connector on the inside wheel well side. Pull hand-tight to remove slack. Move to the outside and connect that fastening system, again pulling tight. Most modern chains include rubber tighteners or cam-lock systems you attach after the main connections are secure. These take up any remaining slack.
Drive forward 10-20 feet and stop. Chains settle during those first rotations. Re-check all connections and tighten again. Verify chains haven't shifted sideways on the tire.
Common installation mistakes I see repeatedly: Installing chains backwards so the aggressive tread pattern faces the wrong direction (toward the wheel instead of toward the road). Leaving chains too loose, which causes them to whip around violently and smash into wheel wells, destroying fenders and potentially cutting brake lines. Forgetting to remove chains once roads clear, which destroys both the chains and your tire tread within a few miles of bare pavement driving.
If chains break while you're driving, you'll hear it—loud metal banging or scraping sounds. Stop immediately, don't try to nurse it. Continuing to drive with broken chains damages brake lines, fenders, suspension components, and wiring. Repairs can easily hit $1,500-$3,000. Most chain kits include spare links and connecting tools. Learn to use them before you need them in emergency conditions.
Author: Kevin Thornton;
Source: shafer-motorsports.com
Driving Techniques and Safety Rules with Snow Chains
Chains fundamentally alter how your vehicle handles. That aggressive traction helping you climb snowy grades also makes the vehicle prone to sudden grabbing and jerking during turns.
Speed limits with chains installed typically max out at 25-30 mph, enforced by physics rather than just traffic law. Chains provide incredible traction in snow but become unstable at higher speeds. The metal links or cables can't handle the centrifugal forces of rapid rotation—they literally break apart, sending metal fragments into your wheel well and undercarriage with enough force to puncture brake lines or tear through plastic fender liners.
Accelerate gently. Chains grip so effectively that aggressive throttle application shocks drivetrain components—universal joints, CV axles, transfer cases. Ease into the throttle and let chains work gradually.
Braking requires more distance than you'd expect. Chains dramatically improve acceleration traction but don't shorten stopping distances nearly as much. The chain links contact pavement intermittently rather than continuously like rubber tires. Maintain at minimum 6-8 seconds following distance behind the vehicle ahead of you.
Turning demands smoothness. Sharp steering inputs cause chains to bite suddenly and yank the vehicle in unexpected directions. Make gentle, progressive steering corrections. Avoid lane changes unless absolutely necessary.
Pull chains off immediately once you reach bare or mostly bare pavement. Chains self-destruct on clear asphalt. Even two or three miles of bare-pavement driving can wear through cable chains completely. Watch for "End Chain Control" signs or designated chain removal areas indicating conditions ahead no longer require chains.
Sarah Mitchell, the Lead Winter Driving Instructor at Colorado Mountain Driving School, told me something that stuck: "The biggest mistake I see? Drivers install chains and suddenly think they're invincible. Chains help you go—they don't help you stop or turn nearly as much. I tell students to cut their normal speed in half and double their following distance. Chains are a tool for maintaining basic traction, not a license for aggressive winter driving. You're still driving on ice. Act like it."
Store removed chains in a plastic tub or heavy-duty trash bag. Chains emerge from use covered in snow, ice, and road salt. Tossing wet, salty chains directly into your trunk causes rust on the chains and corrosion damage to your vehicle's interior.

Author: Kevin Thornton;
Source: shafer-motorsports.com
Frequently Asked Questions About Snow Chains
Preparing for Winter Roads
Snow chains solve a specific problem—they provide emergency traction when conditions exceed what tires alone can handle. They're not everyday winter driving equipment, but when storms hit hard and roads turn into ice rinks, chains become the difference between safely reaching your destination and sitting stranded on a mountain shoulder while Highway Patrol works through a backlog of rescues.
Understanding chain types, legal requirements, and installation techniques transforms chains from intimidating emergency equipment into manageable safety tools you can deploy confidently when conditions demand them.
Purchase chains before winter storms arrive, not during them. Stores sell out completely within hours once forecasts predict heavy snow, leaving late shoppers with no options except overpriced gas station chains or rental options (if you're lucky). Verify your exact tire size from your door sticker or tire sidewall, check your owner's manual for clearance restrictions, and practice installation at home in daylight under comfortable conditions.
Store chains somewhere accessible in your vehicle throughout winter months—not buried under luggage in a storage unit or forgotten in your garage. Mountain weather changes rapidly. Clear morning conditions can deteriorate into chain-required blizzards by early afternoon. The chain control checkpoint isn't the place to discover you left chains at home or purchased the wrong size.
Winter mountain driving demands respect for changing conditions, proper equipment, and knowledge to use that equipment effectively. Chains are your backup plan when winter roads exceed your vehicle's normal capabilities. With proper chains correctly installed and careful driving techniques, you'll navigate winter's worst conditions safely while less-prepared drivers sit stranded, wondering why their all-season tires weren't sufficient.
Related Stories
Read more

Read more


The content on Auto Insights is provided for general informational and educational purposes only. It is intended to offer guidance on car buying, vehicle ownership, finance, insurance, EVs, maintenance, accessories, reviews, and related topics, and should not be considered professional financial, legal, insurance, mechanical, or investment advice.
All information, tools, calculators, comparisons, and recommendations presented on this website are for general guidance only. Individual financial situations, driving habits, vehicle conditions, insurance policies, and market factors vary, and actual results or costs may differ from estimates provided.
Auto Insights makes no guarantees regarding accuracy, completeness, or current applicability of the information, as automotive markets, regulations, incentives, interest rates, and vehicle specifications may change over time.