
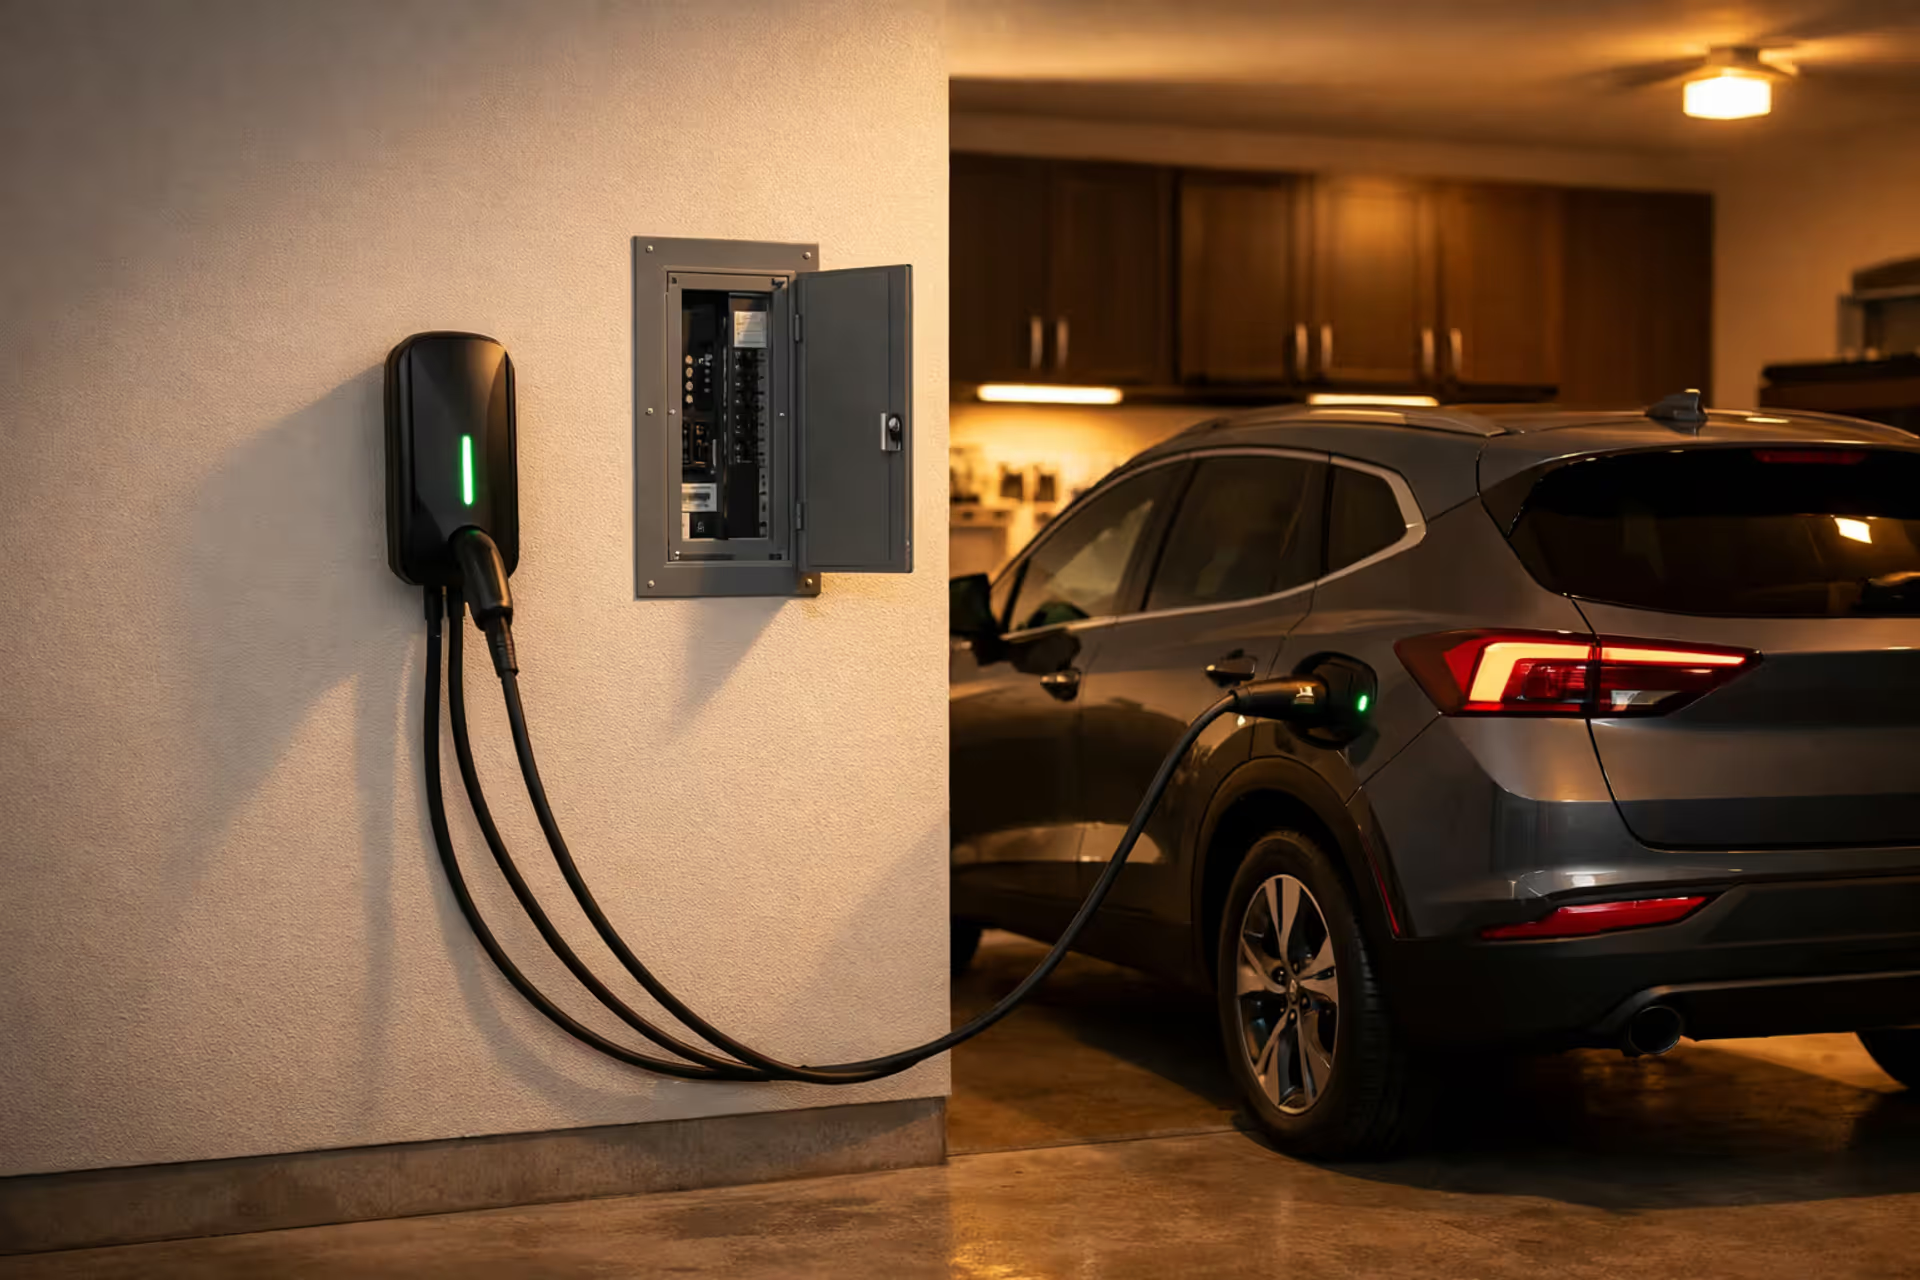
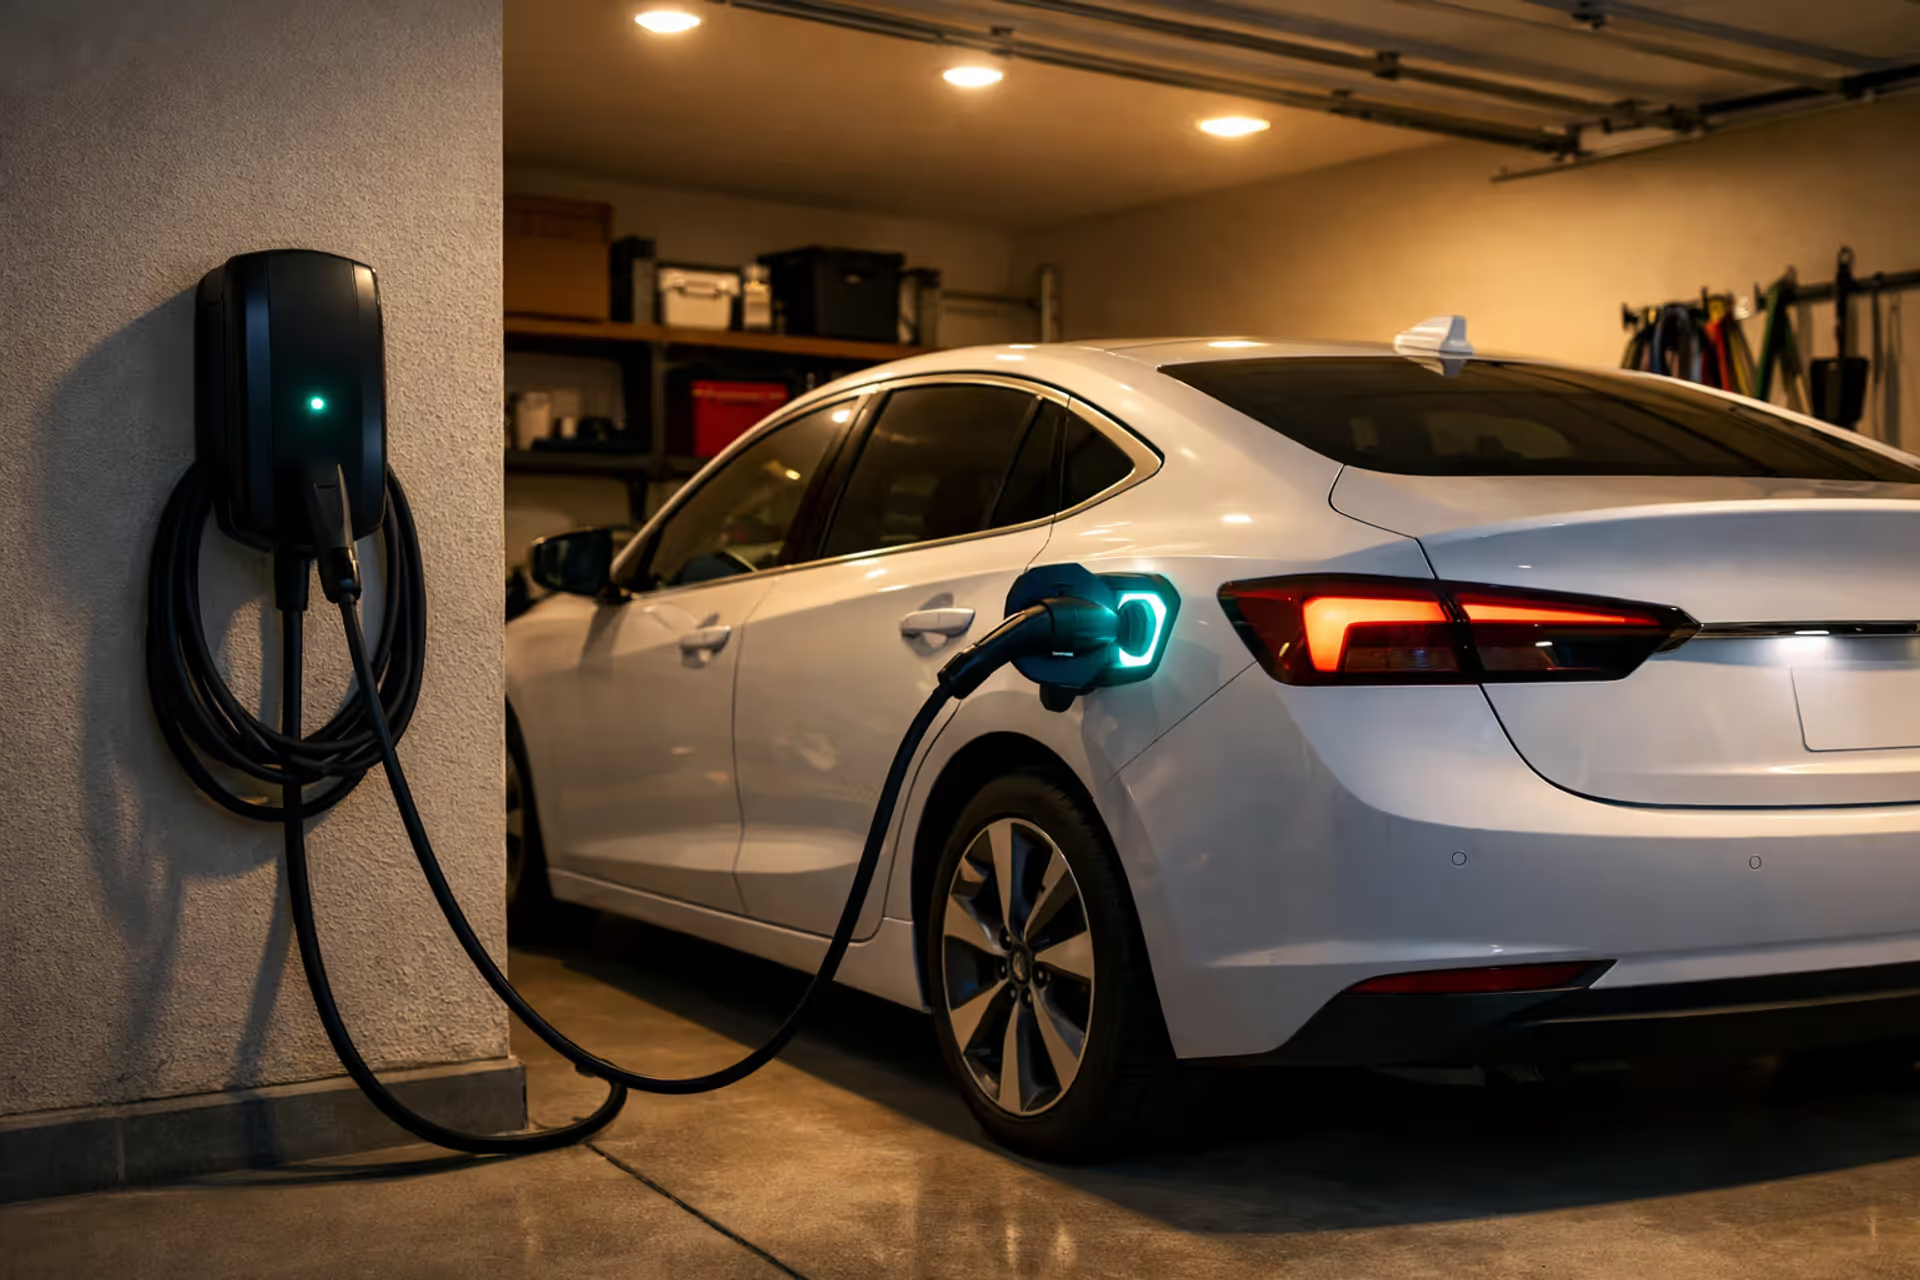
Electric vehicle plugged into wall-mounted Level 2 home charger inside residential garage at evening
How to Plan Your Home EV Charging Setup: A Complete Installation Guide

Content
Content
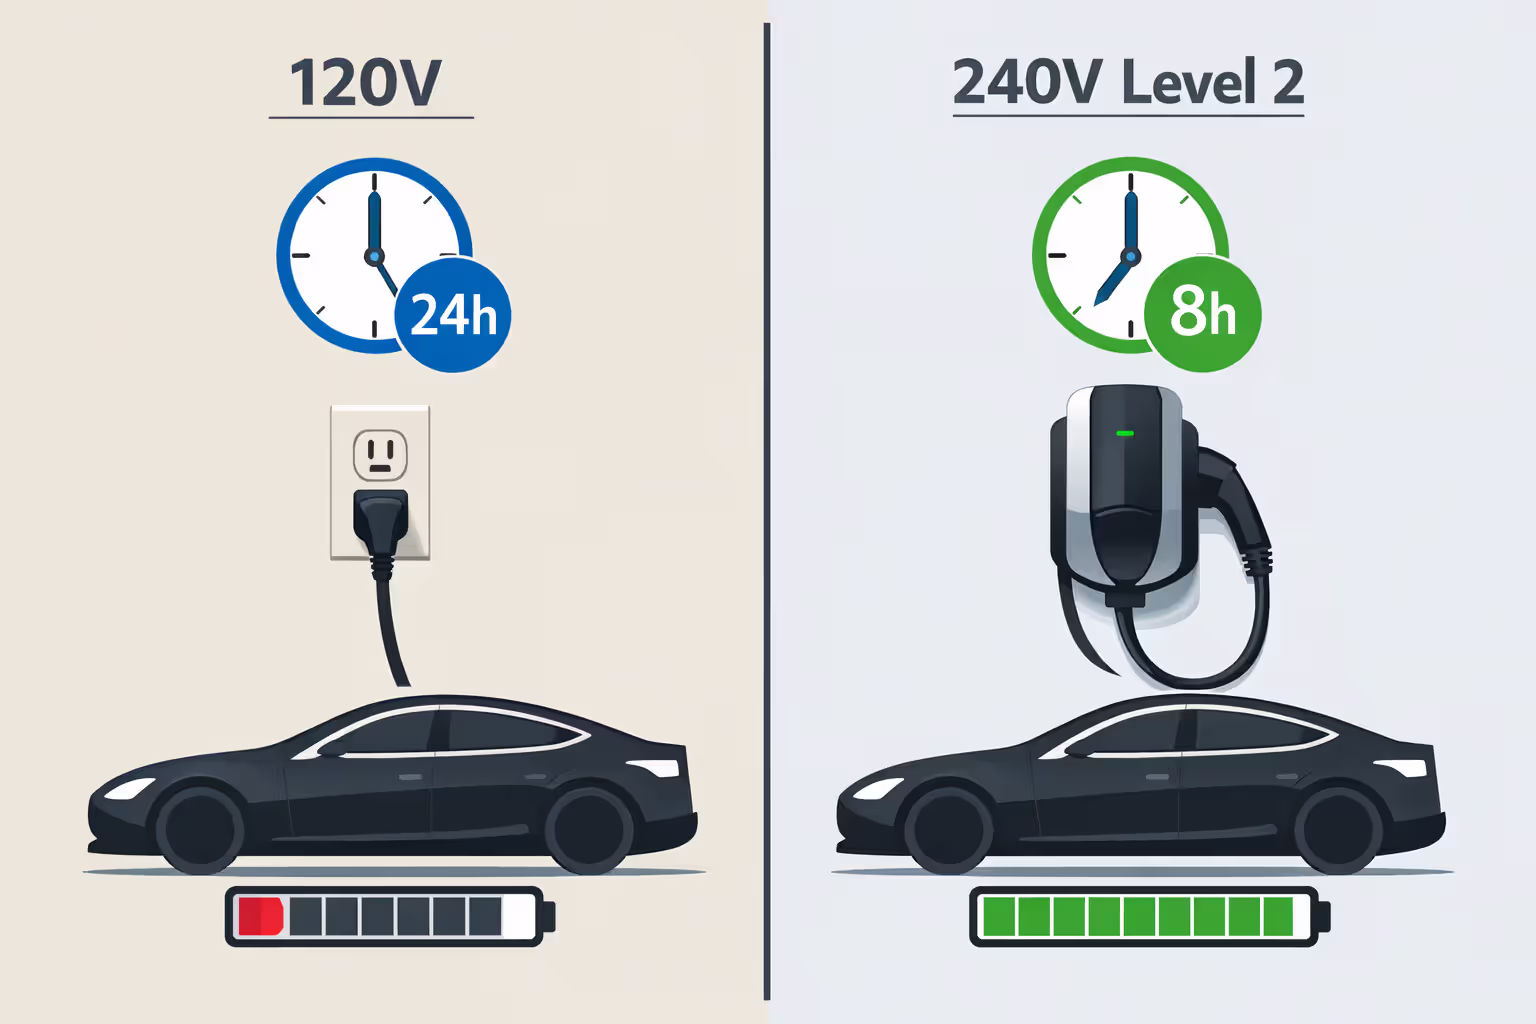
Here's what nobody tells you about home EV charging: that regular 120-volt outlet in your garage? It'll take roughly 24 hours to fully charge a dead battery. I learned this the hard way after buying my first electric vehicle and assuming "plugging it in" meant waking up to a full charge.
Most new EV owners face this same surprise. You've dropped $45,000 on a vehicle, driven it home with 30% battery remaining, and plugged into your garage outlet overnight. Morning comes—you've gained maybe 35 miles of range. Suddenly you're researching electrical panels, permit requirements, and installation quotes that range from $600 to $6,000 with no clear explanation why.
Getting your charging infrastructure right the first time requires knowing what your electrical system can handle, picking equipment that matches your actual driving habits, and working within your local building codes. Whether you'll spend closer to that $600 or $6,000 depends mostly on factors you can evaluate before contacting any electrician.
Understanding Your Electrical System's Capacity for EV Charging
Think of your electrical panel as a hotel—it has a maximum occupancy limit, and every appliance reserves some of that space. Level 2 chargers typically pull 32-48 amps continuously for hours, similar to running your electric dryer non-stop through the night.
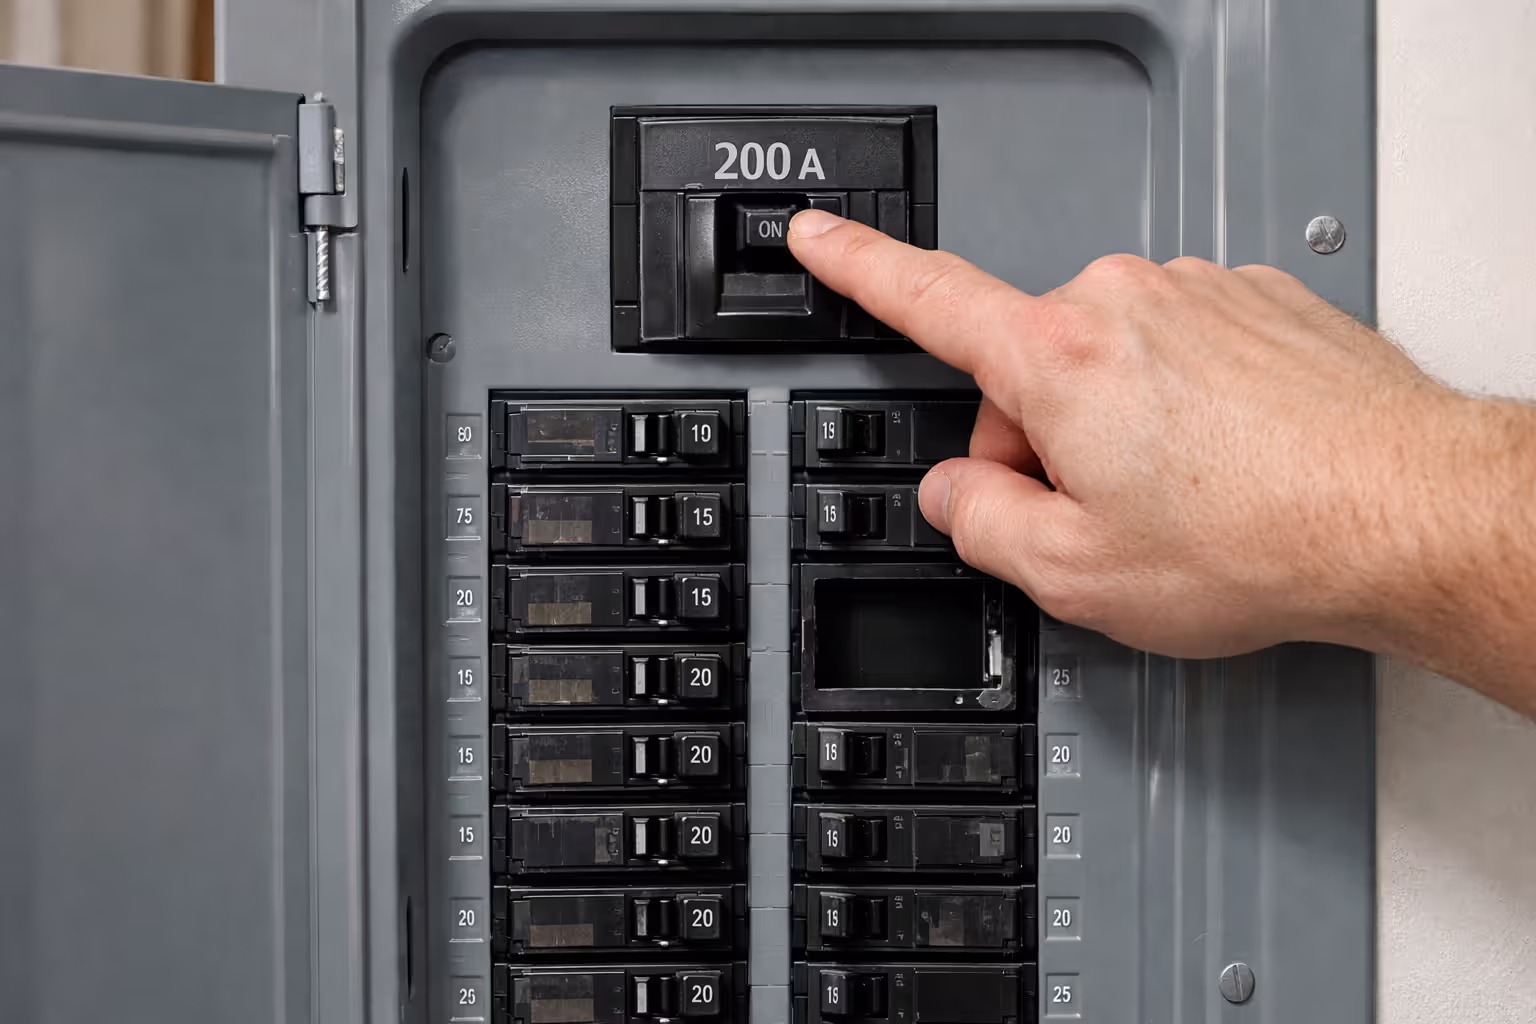
Walk to your electrical panel and open the metal door. The largest switch (usually positioned at the panel's top) shows your main breaker rating. You'll see numbers like 100, 150, or 200. Properties constructed after 1990 typically feature 200-amp service. Houses from the 1960s-1980s often have 100-150 amp panels.
When Your Panel Needs an Upgrade vs. When It Doesn't
That 200-amp rating doesn't mean you've got 200 amps sitting unused. Electrical code restricts continuous loads to 80% of total capacity—giving you 160 usable amps from a 200-amp panel.
Add up what's already running in your house: - Central AC unit: 30-50 amps - Electric stove/range: 40-50 amps
- Water heater (electric): 20-30 amps - Clothes dryer: 30 amps - Basic circuits for outlets, lights, refrigerator: 20-30 amps
When your existing loads approach 160 amps and you're adding a 40-amp charger, an electrical panel upgrade EV becomes unavoidable. But here's where it gets interesting—plenty of homes have substantial unused capacity. Got a gas furnace, gas water heater, and gas range? You might be using only 70-80 amps total. Adding EV charging requires no panel work whatsoever.
Newer technology like load-sharing devices can monitor your home's real-time electrical usage and automatically dial down charging speed when you're running the dryer and AC simultaneously. These smart systems often eliminate the need for panel upgrades on borderline situations.
Author: Kevin Thornton;
Source: shafer-motorsports.com
Load Calculations: Does Your Home Have Enough Amperage?
Professional electricians run formal calculations following NEC Article 220 standards. These aren't simple addition—they use demand factors that account for realistic usage patterns.
Your electric range has a 50-amp breaker, but you're not cooking at maximum burner output for hours straight. Demand factors apply statistical reductions based on how people actually use appliances. A proper calculation might prove your 150-amp panel handles a 40-amp EV charger comfortably, even though raw addition suggests otherwise.
Get this calculation done before assuming panel upgrades are mandatory. Electricians charge $100-250 for load calculations, potentially saving you $2,500-4,000 in unnecessary upgrade costs. The documentation also becomes part of your installation requirements EV when submitting permit applications.
The first rule of any technology used in a business is that automation applied to an efficient operation will magnify the efficiency. The second is that automation applied to an inefficient operation will magnify the inefficiency
— Bill Gates
Choosing Between Level 1 and Level 2 Charging for Your Home
Level 1 charging runs off standard 120-volt household outlets, adding roughly 3-5 miles per hour. Level 2 needs 240-volt circuits (like your dryer uses) and delivers 25-50 miles per hour depending on both the charging station and your vehicle.
Charging Speed Comparison by Vehicle Model
Your car's onboard charger—not the wall unit—determines maximum charging speed. The wall equipment just supplies power; the vehicle controls how fast it accepts that power. Real-world examples:
- Nissan Leaf (6.6 kW onboard charger): Adds about 25 miles per hour with Level 2
- Tesla Model 3 (11.5 kW onboard): Gains 44 miles per hour with Level 2
- Ford F-150 Lightning (19.2 kW onboard): Achieves 30 miles per hour on a 48-amp station, jumps to 54 miles per hour with 80-amp equipment
- Chevy Bolt (11 kW onboard): Receives roughly 40 miles per hour via Level 2
Match your charging equipment to what your vehicle actually accepts. Installing a high-powered 48-amp unit for a Leaf wastes money—the car's onboard systems can't use that much power. Look up your specific model's AC charging specifications before buying equipment.
Why Most Homeowners Choose Level 2
Level 1 works fine if you drive under 40 miles daily and plug in every single night. Someone with a 25-mile commute recovers that range overnight using existing outlets.
Level 2 charger installation becomes essential when you're: - Covering 50+ miles most days - Making multiple trips and needing quick recharges between them - Charging two vehicles on the same equipment - Living somewhere with cold winters (freezing temperatures significantly slow charging) - Occasionally depleting your battery completely and needing full overnight recovery
Yes, Level 2 costs $800-2,500 installed versus free (using existing outlets). Most households recover that expense within six months through pure convenience value.
Author: Kevin Thornton;
Source: shafer-motorsports.com
Where to Install Your EV Charger: Location Strategy and Code Requirements
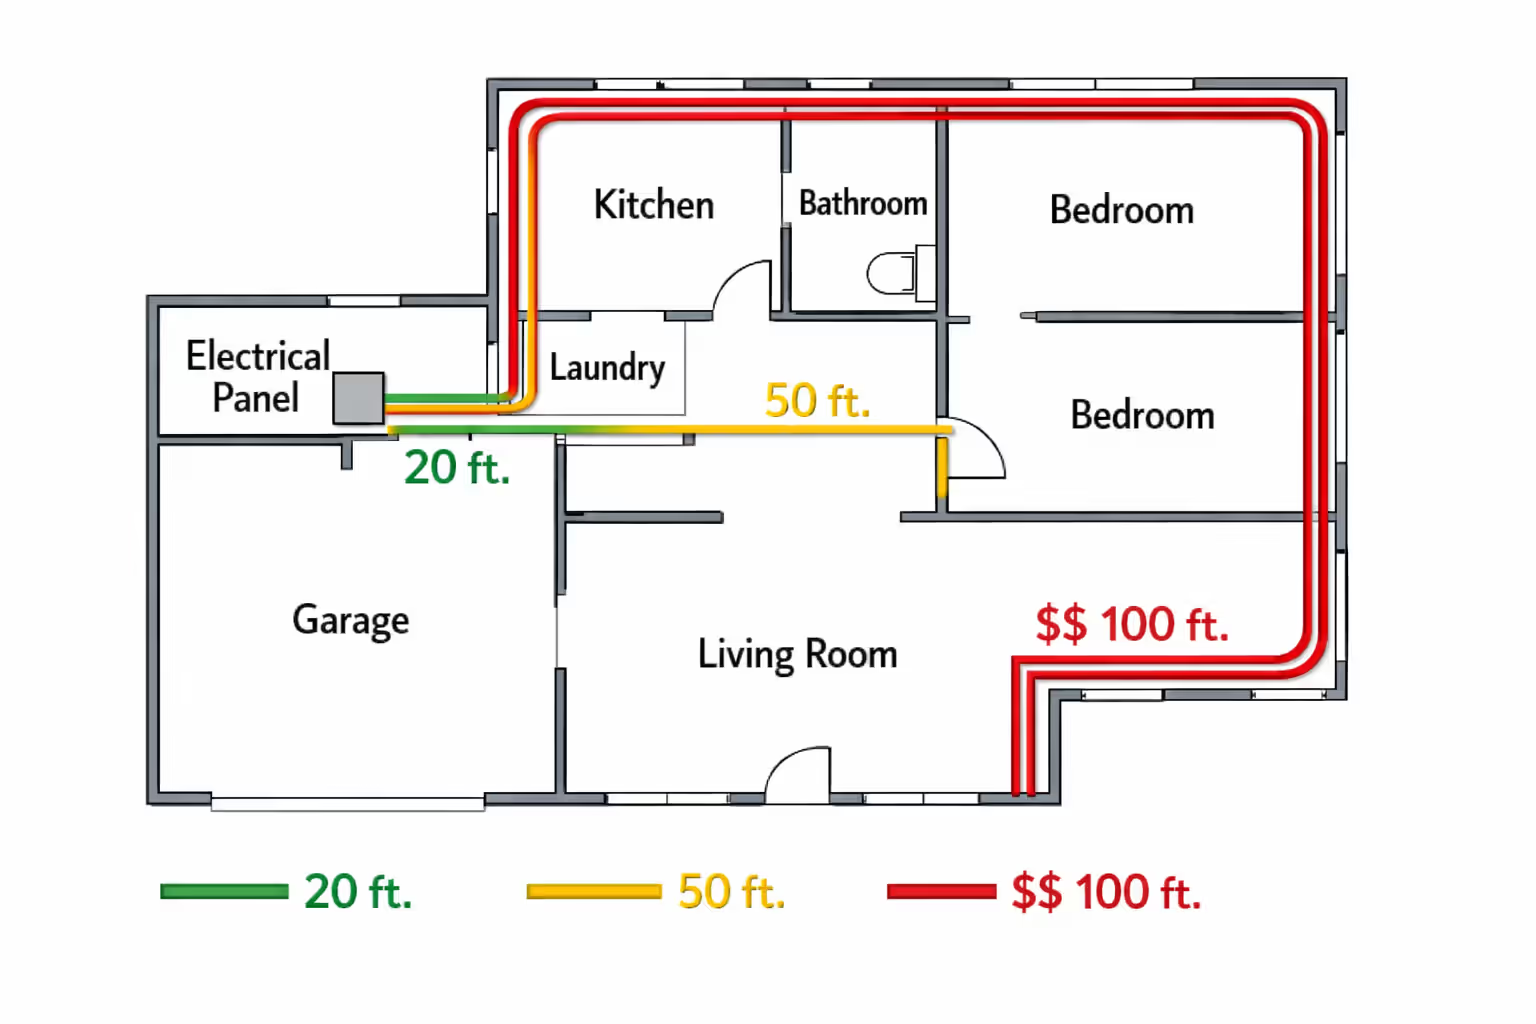
Placement decisions impact your final cost more dramatically than charger brand selection. Equipment mounted directly beside your electrical panel might cost $900 installed. That same charger installed on your driveway 60 feet away? Expect $2,800.
Garage vs. Driveway vs. Carport Installations
Garage mounting offers the straightforward approach. Your charger stays dry, and you're probably parking within 20 feet of your panel anyway. Wire runs stay short. You can use cheaper indoor-rated cable rather than weatherproof versions.
Mount the unit on whichever wall positions it closest to your charge port when normally parked. Measure carefully—most cables extend 18-25 feet, and you want comfortable reach without the cable stretched tight or draped across walkways.
Driveway placement demands weatherproof housing and frequently requires trenching. Panel located on the opposite side of your house from the driveway? You're either trenching across landscaping or running conduit around exterior walls. Trenching runs $8-15 per foot, and crossing sprinkler systems, established gardens, or concrete walkways multiplies costs.
Carport installations fall somewhere between. You'll need weatherproof equipment but might avoid trenching if the carport shares walls with your house or garage.
Distance from Panel and Cost Implications
Electricians price copper wire by the foot. Wire suitable for 40-amp circuits costs $3-6 per foot, varying by gauge and material choice. A 100-foot run adds $300-600 just in wire costs.
Runs exceeding 100 feet introduce voltage drop problems. Electrical resistance over long distances reduces the voltage reaching your charger, cutting charging efficiency. Your electrician might need thicker wire—upgrading from 8-gauge to 6-gauge, for instance—which increases material costs 40-60%.
Smart charger placement tips: - Move your parking spot rather than running excessive wire - In new construction, position the electrical panel on the garage wall - For detached garages, install conduit during initial building - Consider pulling oversized conduit even if installing smaller wire now
Author: Kevin Thornton;
Source: shafer-motorsports.com
Breaking Down the Real Costs: Equipment, Labor, and Electrical Work
Accurate home charging cost estimate requires understanding three separate components: the charging equipment itself, electrician labor, and electrical infrastructure modifications.
Equipment pricing spans from $300 for basic 32-amp units to $1,200 for premium smart chargers with WiFi connectivity, load management, and detailed energy tracking. Popular middle-tier options like ChargePoint Home Flex or Grizzl-E cost $400-600.
Electrician rates vary by region and complexity. Hourly rates run $65-120. Simple garage installations take 3-4 hours. Complex projects involving panel modifications or extensive wire runs consume 8-12 hours.
Infrastructure expenses include: - Circuit breaker installation: $50-150 - Wire and protective conduit: $200-800 based on distance - Outdoor disconnect boxes where required: $100-200 - Trenching across yards or driveways: $800-2,000 for typical residential runs - Complete panel replacement: $1,500-4,000
Itemized Cost Breakdown by Installation Scenario
| Scenario | Equipment Cost | Labor Cost | Additional Work | Total Range | Timeline |
| Straightforward garage setup with panel under 20 feet away | $400-700 | $400-600 | $150 for breaker and wire | $950-1,450 | Same day |
| Garage location requiring 50-foot wire path | $400-700 | $600-900 | $400 for wire and conduit | $1,400-2,000 | 1-2 days |
| Driveway placement needing 40-foot trench | $400-700 | $800-1,200 | $1,200 for trenching and wire | $2,400-3,100 | 2-3 days |
| Installation triggering necessary panel upgrade | $400-700 | $1,200-2,000 | $2,500 for panel replacement | $4,100-5,200 | 3-5 days |
| Detached garage requiring underground wire run | $400-700 | $1,500-2,500 | $2,000 for trenching and wire | $3,900-5,200 | 4-7 days |
Hidden Expenses Most Homeowners Miss
Building permit fees typically run $50-300 depending on where you live. Some cities bundle electrical inspections into that permit fee. Others charge separately for each inspection visit.
Notifying your utility company might trigger their own evaluation of your service entrance cable—the thick wires running from the utility pole to your meter. If they determine those cables can't handle your total anticipated load, you're paying $1,000-3,000 for utility company upgrades before you even touch your own panel.
Certain utilities require separate meters for accessing special time-of-use electricity rates. That second meter installation costs $500-1,200 but could reduce your charging costs $40-80 monthly if your utility offers significantly cheaper overnight electricity.
Cutting through concrete adds $200-500 when conduit must run under garage floors or driveways. Drywall repair and repainting add $200-400 for installations requiring holes through interior walls.
Permits, Inspections, and Safety Standards You Must Follow
All permanently installed EV chargers require electrical permits. Plugging a portable Level 1 unit into existing outlets doesn't. Hardwiring any equipment or installing new 240-volt circuits always requires permits and inspections.
NEC Article 625 Requirements Explained
The National Electrical Code addresses Electric Vehicle Charging Systems specifically in Article 625. Critical requirements include:
Ground-fault protection: Every EV charging station must incorporate GFCI (ground-fault circuit interrupter) protection. Modern chargers build this protection directly into the unit, though some local codes mandate GFCI breakers at your panel regardless.
Dedicated circuit requirement: Your charger needs its own circuit. Sharing circuits with outlets, lighting, or any other appliances violates code.
Appropriate wire sizing: Wire must handle 125% of continuous load capacity. Installing a 40-amp charger means wire rated for 50 amps minimum.
Adequate ventilation: Chargers mounted in enclosed spaces need proper ventilation preventing heat buildup.
Accessible disconnect: Many jurisdictions mandate a clearly visible disconnect switch between your panel and charger for emergency shutoff capability.
Licensed Electrician vs. DIY: What's Legal in Your State
Most states mandate licensed electricians for any work on 240-volt circuits. Homeowner exemptions exist in scattered jurisdictions, letting you pull your own permits and perform the work, but you'll still face inspection requirements before powering anything up.
DIY installation saves $800-2,000 in labor costs but introduces risks: - Failed inspections mean rework costs plus additional inspection fees - Insurance companies may deny claims for fire or damage from unpermitted electrical work
- Improper installation can damage your vehicle's charging system - Future home sales get complicated without proper documentation
Even homeowners comfortable with electrical work benefit from professional installation for charging safety home. The price gap between DIY and professional work shrinks considerably after factoring in permit fees, tool purchases, potential rework, and your time investment.
California and several other states have created expedited permitting specifically for EV chargers. Investigate whether your jurisdiction offers fast-track approval or pre-approved installation templates reducing bureaucratic delays.
An investment in knowledge pays the best interest
— Benjamin Franklin
7 Common Installation Mistakes That Cost Homeowners Thousands
1. Undersizing circuit breakers: Putting a 40-amp charger on a 40-amp breaker fails code. Continuous loads demand breakers rated 125% of draw—that 40-amp charger needs a 50-amp breaker minimum. This mistake guarantees failed inspection and complete panel rework.
2. Ignoring future vehicle plans: You're installing for your current Nissan Leaf and choose a 30-amp charger. Three years pass—you trade up to a Lightning accepting 80 amps. Now you're paying for completely new wire, larger breaker, upgraded charger. Plan for your likely next vehicle, not just today's.
3. Poor cable management: Mounting chargers too high or too far from where your charge port sits creates constant cable management headaches. Cables draped across walkways trip people. Cables stretched tight daily wear out within two years instead of lasting ten.
4. Skipping load management systems: You install a second charger without load management, then discover you can't charge both vehicles simultaneously without tripping breakers constantly. Load management systems cost $300-600 upfront but eliminate $3,000+ panel upgrades.
5. Wrong environmental rating for location: Installing indoor-rated chargers outdoors fails inspection immediately. Even covered installations need NEMA 3R ratings minimum if exposed to any weather whatsoever.
6. Forgetting seasonal and landscape changes: That perfect mounting location becomes inaccessible under three feet of snow each winter, or your landscaper plants shrubs blocking access six months later. Think year-round access and potential future yard modifications.
7. Not investigating utility rate programs: Many utilities offer special EV electricity rates requiring separate meters or restricting charging to specific overnight hours. Installing your charger first, then discovering these programs means either missing $500+ annual savings or paying for costly meter modifications afterward.
Author: Kevin Thornton;
Source: shafer-motorsports.com
Mike Hernandez, a master electrician specializing in EV infrastructure for over 15 years, explains: "Homeowners fixate on charger costs and ignore the electrical system completely. I've watched clients buy $600 smart chargers with every feature imaginable, then discover their panel needs $3,500 in upgrades. Start with a professional load calculation. Work backward from there to equipment selection. Never the reverse."
FAQ: Home EV Charging Installation Questions
Making Your Home EV Charging Setup Work Long-Term
Properly planned home EV charging setup eliminates range anxiety completely while cutting fuel expenses 60-70% compared to gasoline. Success requires matching your electrical infrastructure capacity to realistic charging needs without overspending on unnecessary capacity or underspending and requiring expensive future upgrades.
Begin with a professional load calculation establishing your panel's actual available capacity. Select charging equipment matching your vehicle's onboard charging capabilities and your typical driving patterns. Work exclusively with licensed electricians who understand local code requirements and navigate permitting processes efficiently.
That $1,500 professional installation investment buys code compliance, electrical safety, and genuine peace of mind. Cutting corners with undersized circuits, improper grounding, or unpermitted work creates hazards vastly exceeding any savings.
Most homeowners recover charging setup costs within 2-3 years through fuel savings alone. Factor in eliminated maintenance expenses—no oil changes, fewer brake replacements thanks to regenerative braking—and financial benefits strengthen considerably.
Plan for tomorrow's needs today rather than reacting to changes later. Install larger conduit than currently necessary. Position your charger anticipating potential second EV additions. Consider load management systems now if multiple EVs seem likely within five years. Small upfront investments prevent expensive retrofits down the road.
Your home charging setup should become invisible in daily life—you connect the cable when arriving home, your vehicle sits ready each morning. Achieving that seamlessness requires careful planning, professional installation execution, and appropriate equipment matching your specific situation.
Related Stories

Read more
Read more

The content on Auto Insights is provided for general informational and educational purposes only. It is intended to offer guidance on car buying, vehicle ownership, finance, insurance, EVs, maintenance, accessories, reviews, and related topics, and should not be considered professional financial, legal, insurance, mechanical, or investment advice.
All information, tools, calculators, comparisons, and recommendations presented on this website are for general guidance only. Individual financial situations, driving habits, vehicle conditions, insurance policies, and market factors vary, and actual results or costs may differ from estimates provided.
Auto Insights makes no guarantees regarding accuracy, completeness, or current applicability of the information, as automotive markets, regulations, incentives, interest rates, and vehicle specifications may change over time.